LED drl's and chrome turn signal bulbs installed!

The Do It Yourself section is used provide assistance with mods and fixes. Whenever you are making a change to your car please take pictures and notes. Let others know what to watch out for and any useful tricks you learn. If you are starting a post in this section from scratch please hold it to a higher standard than you would for other forum posts. i.e. technical detail and even grammar.
Please post about issues or problems in the Technical Support & Problem Troubleshooting forum.
Post Reply
User avatar
will2k
Posts: 115
Joined: Sat Jun 19, 2010 7:23 am
Location: Sydney, Australia

Finally had a day off and some good weather so i installed my chrome stealth turn signals which eliminate the orange "egg yolk" look.

Before

Image

Chrome bulbs

Image

LED's

Image

DRL's, hazards and headlights on

Image
MODS: catback exhaust, RRM SRI, 6000k HID, white led's all round, 22% tint, Rear swaybar, LED drl's, chrome stealth turn signal, scanguage II.

Sound system: 2 x Alpine 6.5" speakers, 2ch Pioneer amp and Fusion 10" subwoofer tube
gmoney91
Posts: 69
Joined: Fri Dec 03, 2010 9:11 am

DIY instructions please.
Northernstar
Posts: 590
Joined: Tue Jan 18, 2011 9:49 am
Location: Surrey Canada

looks nice~i want to know how to do it too!
User avatar
will2k
Posts: 115
Joined: Sat Jun 19, 2010 7:23 am
Location: Sydney, Australia

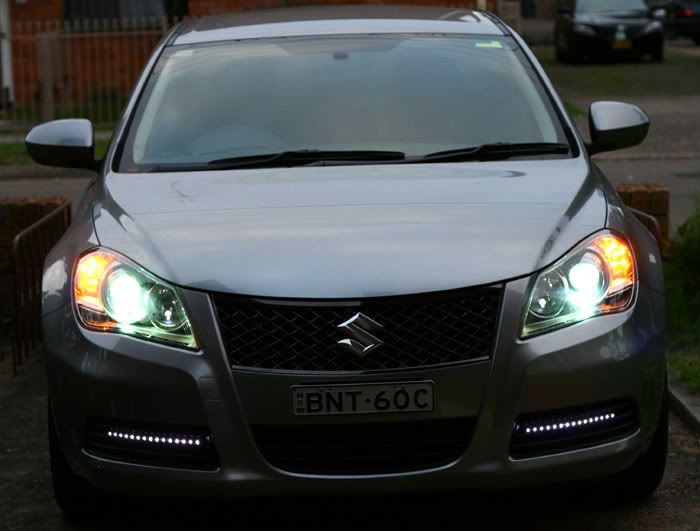
Trust me when i say it looks even better in real life! The 6000k HID's and led's at night are a perfect match in terms of color but in the pics they look different.

Basically all you need is some side shining led strips like these http://cgi.ebay.com/ebaymotors/WHITE-12 ... ccessories

and some wire to hook everything up. I bought about 30 feet of wiring since it was cheap. Don't need anything too thick as it's just led's.

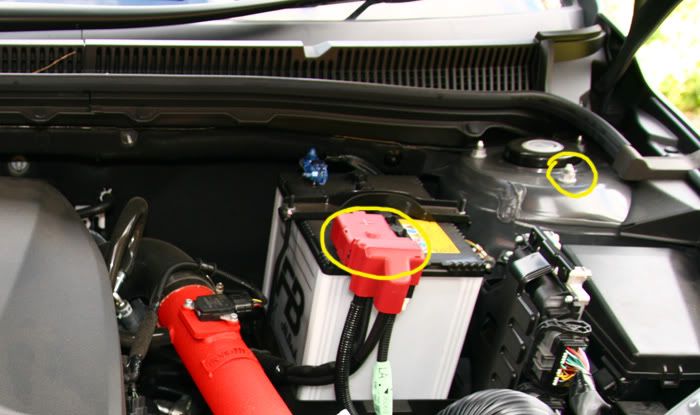
Step 1. Test the LED's first! Each LED strip has 2 wires, make sure you connect 1 wire to the positive terminal on the battery and the other wire to a ground ( i chose the bolt in the picture below ) If they dont work switch them around to see which wire is the ground and which isn't.

I made the mistake of only testing 1 led strip and when i put the bumper back on and was done, one of them didnt work. My led's had a copper and a silver wire, after testing only 1 led i assumed the copper was the ground and silver was the positive but both strips were different so test them both.


Image


Step 2. 
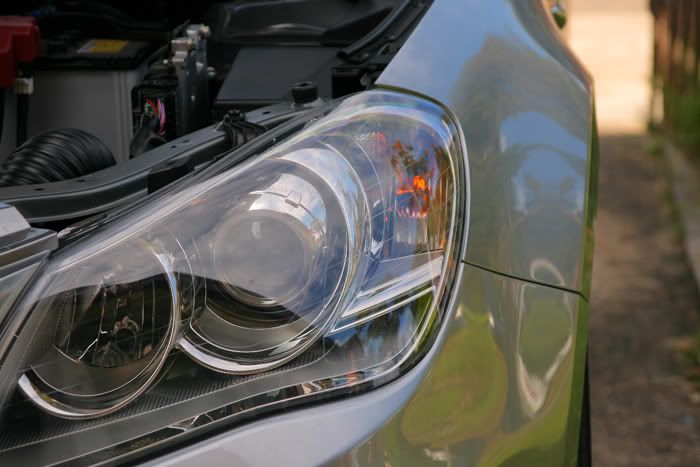
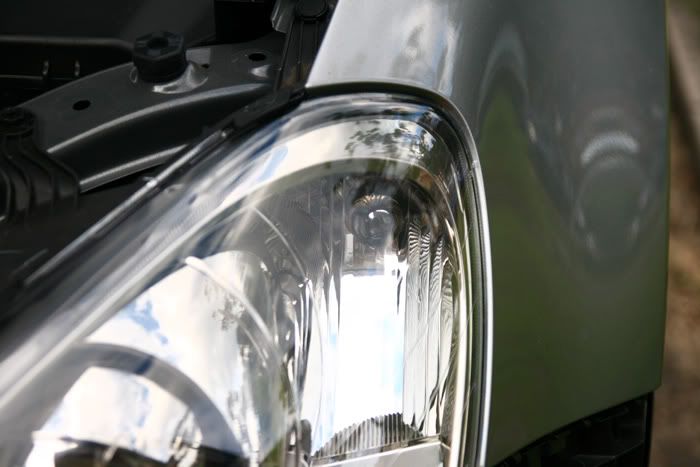
Take the front bumper off. ( I will take pics soon to show you how it's done ) If you look up one of the DIY hid's guides on the forum you can see how it's done also.

Step 3.
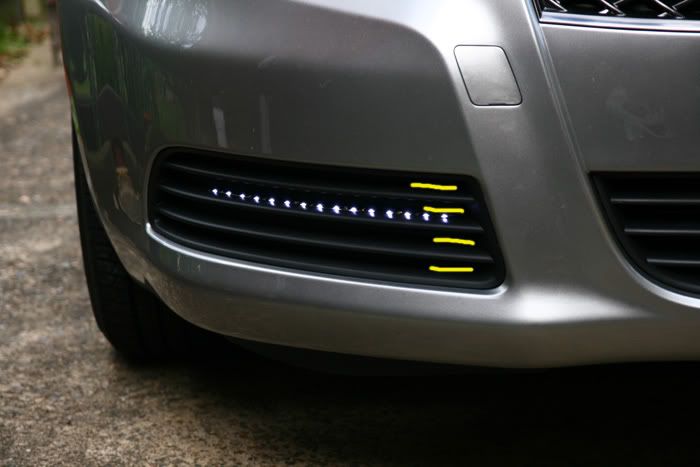
Clean the surface where you will stick the led strips. After some testing i think they looked best on the 2nd grill thing. Below i nthe pic where i put the yellow lines there are cuts in the grill where the wiring can go through.

Image

Step 4. Stick the led strips on

Step 5. Time to do the wiring, to minimise wiring this is probably the easiest way below. I had to do my wiring a tiny bit different because after 1 led didn't work it was a pain in the ass to troubleshoot and get it to work.

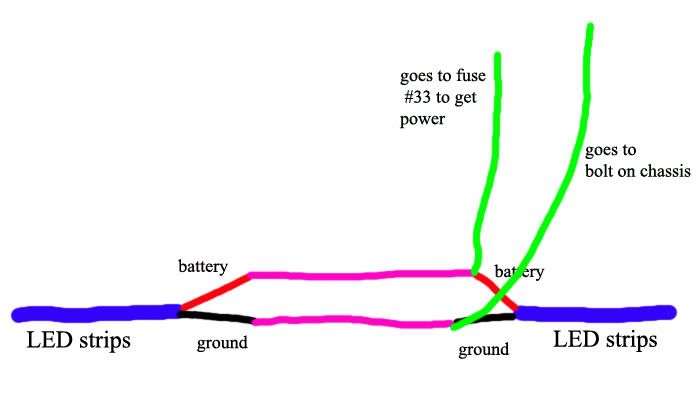
You basically join the negatives from each led together, then join the positives together as shown by the purple wire below. Once that is done you should attach about 4-5 feet ( to be sure ) of wiring to the points below as shown with the green wire.

To keep the wires tidy behind the bumper i found these little clip things where i could put the wires through so they dont hang down. I also used shrink tube wherever i joined wires together so it looks professional.

Image

Step 6. Put the bumper back on but before you do make sure the 2 wires you have ( 4-5 feet long ) are passed under the headlight and into the engine bay near where your battery is and maybe tie them so they dont fall through as you put your bumper back on. Figure out a way so you can tell which wire should be grounded and which should be connected to the fuse.

Step 7. I connected the wire to be grounded to a bolt on the chassis as shown in one of the pictures, and i used a terminal ring so it looks more professional.

The other wire i connected to the fuse #33 in the engine bay which is the rear defogger relay. Thankyou to KCkizashi off the forums for this!

All i did was strip the wire about 3/4 - 1 inch and wrapped it around the pin on the fuse that is closest to the firewall. So imagine you are putting the fuse back in and look at which pin is closest to the firewall. This way the led's turn on when the car is on and automatically off when the car is off.

That should be it. Let me know if you have any questions. I will take some detailed photos about getting the front bumper off.
MODS: catback exhaust, RRM SRI, 6000k HID, white led's all round, 22% tint, Rear swaybar, LED drl's, chrome stealth turn signal, scanguage II.

Sound system: 2 x Alpine 6.5" speakers, 2ch Pioneer amp and Fusion 10" subwoofer tube
Northernstar
Posts: 590
Joined: Tue Jan 18, 2011 9:49 am
Location: Surrey Canada

where did you get the stealth turn signal bulb?
~tc~
Posts: 999
Joined: Tue Mar 29, 2011 3:33 am
Location: Houston, TX USA

will2k wrote:The other wire i connected to the fuse #33 in the engine bay which is the rear defogger relay. Thankyou to KCkizashi off the forums for this!

All i did was strip the wire about 3/4 - 1 inch and wrapped it around the pin on the fuse that is closest to the firewall. So imagine you are putting the fuse back in and look at which pin is closest to the firewall. This way the led's turn on when the car is on and automatically off when the car is off.
So all this work, and then that ghetto technique? Fortunately, you can get away with a lot because of the very low amp draw of LEDs.

The better way would be to find the switched power lead back into the cabin, and then splice into it (using soldered connections) with a fused lead. The next better way, and much better if you plan on adding more electrical accessories, is to run a separate fuse box with a lead straight from the battery. The best way (although admittedly unnecessary for LED's) is to run a lead straight from the battery through a relay, essentially creating your own switched power.
2011 Sport SLS with nav Black Pearl Metallic
pmw1213
Posts: 41
Joined: Mon Jun 06, 2011 6:55 pm
Location: CAPE CORAL, FLORIDA 33909
Contact:

LED'S DID THE SAME METHOD ONLY DID NOT REMOVE BUMPER, CENTER GRILL JUST POPS OUT HELD BY CLIPS ATTACHED TO BUMPER, DRILLED 2 -1/8TH INCHES HOLES IN TOP GROOVE PUSH WIRES THROUGH SOLDERED TOGETHER +/_ AND SHRINKWRAPPED THEM AND RAN BEHIND LEFT HORN FOLLOWING WIRING HARNESS RIGHT UP TO FUSE BOX, HOOKED UP POPED GRILL BACK IN A HAVE LIGHT. DOES LOOK GREAT.
Post Reply